

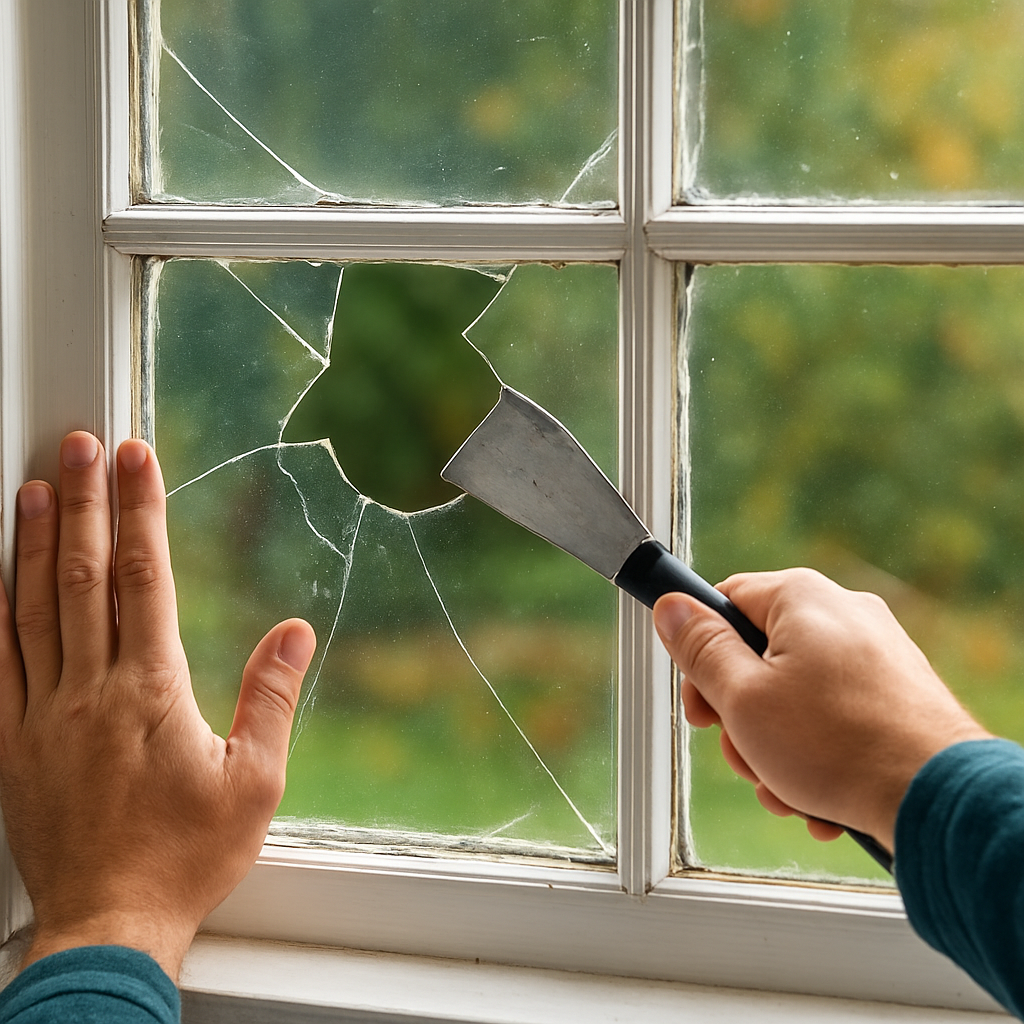
House window repair starts with accurate diagnosis: a draft, a cracked pane, or a fogged double-pane unit need different fixes and different budgets. This guide walks Ocala homeowners through safe DIY fixes for common problems, how to recognize when insulated glass or frames must be replaced, realistic cost ranges, and when to call a licensed pro such as R C Windows & Doors. Expect Florida-specific code and storm considerations, simple step-by-step remedies, and a short checklist to prepare for an on-site estimate.
1. How to Diagnose Window Problems Accurately
Start at the seams. The majority of window failures you can fix or triage yourself show clear signs where glass meets frame, not out in the middle of the pane.
Divide the problem into three tracks: air leaks, glass failure, and frame/hardware. Run simple tests for each rather than guessing. That saves time and prevents unnecessary glass orders or full replacements.
Practical tests to run now
- Draft detection: Use an incense stick or a thin tissue at the edge of the sash while someone else closes and locks the window. Move slowly along the perimeter and watch for steady movement – short gusts from HVAC are different from continuous leaks.
- Fogged IGU check: Look for condensation trapped between panes from both inside and outside. If moisture is inside the sealed cavity the unit has failed and cleaning will not help.
- Hardware and sash movement: Open and close the window. Note sticking points, rattles, or play in the sash that indicates worn rollers, broken balances, or out of-square frames.
- Water intrusion test: Lightly spray the exterior seams while someone watches the interior for leaks. This distinguishes failed exterior caulk from interior condensation or humidity.
Document for estimates. Measure visible glass height and width, take photos from inside and outside showing the whole frame, and capture any labels on the frame or glass stamp such as tempered or NFRC stickers. A clear photo of fogging, spacer corrosion, or rot speeds an accurate quote and reduces on-site surprises.
Tradeoffs and limitations. A quick draft test will tell you air movement but not why the frame is out of square. Thermal cameras reveal heat loss paths but are professional tools and can be misleading if you do not control interior airflow. Also, fogged insulated glass units almost always require IGU replacement for a reliable fix; masking the problem with interior dehumidifiers only delays the inevitable.
Common misdiagnosis I see in the field: Homeowners assume a draft equals failed glass. In many older homes the real issue is compressed weatherstripping or sash rot that lets air bypass a perfectly good insulated unit. Fixing the sash can be cheaper and restore comfort without replacing glass.
Concrete example: An Ocala cottage had visible fogging plus a persistent breeze at the lower sash. Inspection showed an IGU with seal failure and a rotted lower sash that allowed water into the frame. The short term fix was new weatherstripping and temporary interior sealant; the long term solution required an IGU replacement and minor wood repair to prevent repeat failure.
Quick diagnostic checklist: Run an incense draft test, photograph fogging and frame labels, perform a light water spray test, and note sash movement. If you observe seal failure, visible rot, or tempered glass stamps, prepare to call a pro for safe replacement or structural repair.
Do not attempt to remove or drill tempered glass. If you see a tempered stamp or suspect laminated or impact glazing, stop and call a licensed installer.
Next consideration: after diagnosing whether the problem is draft, glass, or frame related you will have a clearer set of options — small repairs, IGU replacement, or full window service — each with different cost and longevity implications.
2. Quick DIY Remedies for Drafts and Air Leaks
Small perimeter fixes are the fastest way to stop drafts and cut HVAC cycling. Most drafty windows are not failed insulated glass units but gaps where sash meets frame or where exterior caulk has pulled away. Tackle the obvious gaps first and reserve glass work for when you can see seal failure or structural rot.
Practical quick fixes and how to prioritize them
- Replace weatherstripping where it compresses or crumbles. Use V-strip on double hung sashes, silicone bulb gaskets on sliding sashes, and dense foam tape for narrow, irregular gaps. Clean surfaces, cut to length, and compress firmly into the groove for a neat seal.
- Recaulk exterior seams properly. Remove failed caulk, allow joints to dry, then apply a quality silicone or hybrid exterior caulk. Use painter tape either side of the joint for a straight bead and tool the joint for full adhesion. In Florida choose a product rated for constant humidity and UV.
- Adjust hardware and sash alignment. Tighten hinge and strike plate screws, replace missing sash stops, and shim loose jambs to reduce rattles and wind-driven gaps. Small adjustments often restore sealing without replacing glass.
- Temporary seasonal measures. Clear plastic window film can reduce drafts in cooler months and lower radiant heat loss at night, but it is temporary. For doors, replace worn threshold sweeps to stop underdoor breezes.
Tradeoff to accept: the lowest cost materials are easy to install but often fail sooner in hot, humid climates. Thin adhesive foam strips cost a few dollars but can deteriorate in 1 to 2 years. Spending roughly two to three times more on a proper bulb gasket or premium silicone usually delivers multiple years of reliable performance and fewer repeat visits.
Limitation and warning: these repairs seal air paths but do not fix a failed insulated glass unit or structural wood rot. Sealing over a rotten sash or a fogged IGU is only a stopgap and will not restore energy performance or stop moisture intrusion. If you see condensation trapped between panes or soft wood at the sill, plan for professional follow up.
Concrete Example: A homeowner in Ocala reduced a noticeable nightime draft by replacing a shredded vinyl sweep on a sliding window and installing a new silicone bulb gasket on the stationary track. The job cost under $40 in materials, eliminated the draft, and lowered noise; however, a later inspection showed the sill needed minor rot repair to prevent water driven failures in the next rainy season.
Key tip: Always prep the surface before applying weatherstripping or caulk – remove old material, clean with isopropyl alcohol, and confirm surfaces are dry. Proper prep matters more than brand for long term adhesion.
Next consideration: if simple sealing and hardware adjustments do not stop the leak or if you suspect IGU failure, schedule a professional inspection at R C Windows & Doors so you do not waste time on superficial fixes.
3. Replacing Broken or Cracked Glass: DIY Steps and Limits
Practical rule up front: replacing a small, non-safety single pane in a simple wood or aluminum frame is a realistic DIY; anything involving tempered, laminated, insulated glass units (IGUs), large panes, or impact-rated glazing should be handed to a pro.
When DIY makes sense
Typical DIY candidates: small interior panes set with glazing compound or simple glazing beads, modest-sized casement or sash panes that are not tempered and sit at reachable heights. These jobs avoid factory seals, heavy handling, and code issues.
- Step 1 – Measure and order correctly: measure visible glass width and height to the nearest 1/16 inch; tell the shop whether the glass is annealed single-pane and whether it needs polished edges. Buy a slightly smaller glass if framed by beads (shop can confirm).
- Step 2 – Safety and prep: wear cut-resistant gloves, eye protection, and thick sleeves. Lay a drop cloth inside, remove loose fragments carefully, and dispose of shards in a rigid container.
- Step 3 – Remove old glazing: score and pull old putty or silicone, remove glazing points or beads, clean the rabbet, and prime bare wood if you will use traditional linseed putty.
- Step 4 – Dry-fit and set: dry-fit the new piece, bed a thin line of glazing compound or a compatible silicone, press glass into place, install new glazing points, tool the compound smooth, and allow full cure per product instructions.
- Step 5 – Finish: prime and paint exterior-facing putty after initial set if using traditional putty; clean glass and test sash operation before declaring the job done.
| Glass type | DIY? | Why or why not |
|---|---|---|
| Annealed single-pane | Often | Simple to cut/fit; no factory seals or special handling |
| Tempered safety glass | No | Shatters unpredictably and requires exact replacement size and handling |
| Insulated glass unit (IGU) | Usually no | Seals and spacers are factory-built; replacement requires matched units for thermal performance |
| Laminated or impact glass | No | Special ratings and code implications; pro installation required |
Tradeoff to acknowledge: DIY reglazing is cheap and fast but usually does not improve thermal performance. Replacing a single annealed pane with a low-E IGU is possible only if the sash can accept the thicker unit; otherwise you fix appearance but not energy loss.
Concrete Example: An Ocala homeowner replaced a cracked single-pane in a small bedroom casement. They measured, ordered a piece from a local glass shop for about $85, removed old putty, installed the new pane with glazing points and compound, and painted the bead after cure. The job took an afternoon and solved the draft and broken glass — but during the job they discovered loose muntins that needed a follow-up sash repair to prevent future seal stress.
Important limit: If the unit has an identification stamp indicating tempered, or if the pane is part of a door, large fixed picture window, or an IGU, stop and call a licensed installer. Handling safety glass, insulated seals, or impact-rated glazing without the right tools risks injury, failed installation, and possible code noncompliance.
Common mistake I see: homeowners try to cram a thicker IGU into a rabbet designed for single-pane glass. It may appear to fit but causes glazing bead stress and premature seal failure. If you plan to upgrade to low-E or thermal panes, confirm sash depth and weight limits before ordering.
Takeaway: do the simple, low-risk pane swaps yourself if you have steady hands and the right safety gear; for tempered, IGU, laminated, large, or code-sensitive glazing plan a professional replacement to avoid rework, liability, and hidden long-term costs.
4. Fogged Insulated Units and Failed Seals: Repair Options
Immediate assessment: visible moisture or a grey haze trapped between panes means the hermetic seal is compromised. Wiping the interior or running a dehumidifier treats symptoms, not the failed seal; the sealed cavity has lost its dry air and insulating value.
Why the seal fails and what that changes
Seals break for mechanical and chemical reasons: repeated temperature swings flex the glass and spacer, desiccant in the spacer saturates, or the primary and secondary sealants degrade. When the spacer corrodes or the sealant gaps, moisture migrates in and the unit no longer insulates. That changes the fix: you can not reliably restore factory thermal performance by surface cleaning or minor caulking.
Realistic repair paths: replace just the insulated glass unit (IGU) or replace the whole sash/window. Replacing the IGU is the lowest-cost durable fix when the frame and glazing rabbet are sound and the original window is not impact-rated. A full window replacement is the right call when the frame has rot, the sash is warped, or you want an upgrade to impact or higher-performance glazing that the existing frame cannot support.
- IGU replacement — when it makes sense: frame square, no rot, and the rabbet accepts the factory unit; preserves original frame and is faster with less disruption
- Full window replacement — when to choose it: visible wood rot, out-of-square frames, repeated IGU failures on the same window, or when you require impact-rated or thicker low-E units that the sash cannot carry
- Temporary remediation — what it buys you: drilled-vent with desiccant or suctioning the cavity can clear fog for months in dry climates but usually fails sooner in humid Florida and can void warranties
Practical tradeoff: replacing only the IGU is cost-effective and recovers most of the energy performance if the frame is structurally sound. But patching a bad frame with a new IGU is a short-shelf solution if moisture is migrating through rot or failed exterior seals. In humid coastal climates, temporary fixes often return sooner than homeowners expect.
Real-world case: a homeowner in Ocala noticed fogging on two adjacent living-room panes but the sills looked solid. We replaced the two IGUs, resealed the exterior perimeter with a moisture-rated hybrid caulk, and the windows regained thermal performance with minimal disturbance. Two years later other windows with underlying sill rot required full sash replacement — showing that spot IGU fixes are economical when underlying framing is healthy, but not a blanket solution for an aging window system.
If a unit is fogged and the frame shows soft wood, prioritise fixing the frame first; otherwise the new IGU will be stressed and likely fail again.
Decision checkpoint: choose IGU replacement when the frame is solid and you need a quick, affordable recovery of insulating value; choose full replacement when structural issues, impact-code upgrades, or repeated failures make long-term value and warranty coverage the priority. For a professional assessment and matching IGU options see glass replacement and schedule a site visit through window repair.
Next consideration: before you order glass, verify whether the existing sash depth, hardware, and any impact-rating requirements will accept the replacement IGU or if a full window upgrade is the wiser investment. When in doubt, document photos and call a licensed inspector so you avoid repeated repairs and uncovered warranty gaps.
6. Tools, Materials, and Safety Gear for Window Work
Get the basics right first. For effective house window repair the single best decision is assembling a small, reliable kit and knowing which items you must rent or leave to a pro.
Tool kit by purpose
Measuring and prep gear: measuring tape, feeler gauges or a set of thin shims, isopropyl alcohol and clean rags, painter’s tape, and a rigid drop cloth. Accurate measurements and clean surfaces avoid misordered glass and failed seals.
- Basic hand tools: utility knife, stiff putty knives (two sizes), flat and Phillips screwdrivers, compact cordless driver with clutch, and a set of small pry bars for glazing beads.
- Glazing supplies: glazing points, glazing compound or compatible silicone, glazing wedges, and replacement weatherstripping tailored to your sash type.
- Safety and handling: safety glasses, cut-resistant gloves, leather over-gloves, and an N95 or better respirator for old paint dust or sanding.
- Lift and heavy handling (rent when needed): glass suction cups, two-person vacuum lifters for large panes, and roller dollies for transport.
Pro-only gear and why it matters. Factory-sealed IGUs, tempered panes, and oversized glazing require specialized lifting gear, glazing tables, cranes, or certified installers with impact-rated training. Attempting these without the equipment risks injury, failed installs, and voided warranties.
Buy vs rent tradeoff. Buy PPE, basic hand tools, and a good caulk gun. Rent suction cups, vacuum lifters, and any powered glass-handling equipment for a one-off job. In practice this saves money and avoids storing equipment you rarely use, while keeping safety standards high.
Where to source materials. For common supplies use big-box stores for weatherstripping and DAP or GE caulk. For custom-cut glass, insulated units, or specialty glazing components use a local glass shop or a commercial supplier such as CR Laurence; for matching thermal panes consult a professional to avoid ordering the wrong IGU thickness. See glass replacement for service options.
Practical limitation to accept. Even with perfect tools a homeowner often lacks the lifting capacity and insurance coverage for large or laminated panes. The real cost of doing it yourself is not just money but potential rework and liability if a heavy pane breaks or the replacement seal fails.
Concrete example: A homeowner replacing a small bedroom single-pane ordered a glass cut to size, borrowed a pair of 8-inch suction cups from a rental shop, used cut-resistant gloves and a cordless driver, and completed the reglazing in one afternoon for under $120. They avoided renting larger vacuum equipment because the pane was under 24 by 30 inches — a judgment call that saved time but required strict PPE and two people to lift safely.
Key safety note: If the pane is stamped as safety or you suspect laminated or impact glazing, treat the job as professional-only work — the handling, disposal, and legal code implications are not analogous to small single-pane repairs.
Local tip: Marion County accepts double-bagged small glass in regular trash if contained, but larger framed assemblies often require a licensed hauler or recycling drop-off. When in doubt, document and ask for disposal options during a service visit or contact R C Windows & Doors for guidance.
Next consideration: assemble PPE and the basic hand kit before you remove any glass. That preparation narrows the work you can safely do yourself and makes the decision to hire a pro clearer when specialized tools are required.
7. Florida Specific Considerations: Codes, Impact Glass, and Weather
Immediate point: Florida rules and climate change the right repair more often than you think — what looks like a simple cracked pane can trigger code, permit, or insurance consequences that make a DIY fix false economy.
Code, permits, and insurance — what to check before you order glass
Check the label first. If the glass or frame carries an impact, tempered, or product approval stamp you are in a different regulatory lane. Replacing or altering those units can force a permit or require work to meet current Florida Building Commission standards.
Practical solution: Contact your insurer before upgrading to impact glazing. In many cases insurers offer premium credits for hurricane-rated windows, but they also require documented installation by licensed contractors and sometimes proof of a permit. Skipping that step risks denial of future windstorm claims.
Weather, humidity, and material choices that matter in Marion County
Humidity shortens seal life. High-year-round moisture accelerates spacer corrosion and sealant breakdown on insulated units. Temporary fixes that remove moisture from the cavity rarely last in our climate; plan repairs that address exterior seals and underlying wood or metal corrosion at the same time.
Material tradeoff: Impact and laminated glass cost more and are heavier. They buy storm protection and security, but often require reinforced frames or full window replacement rather than a straight IGU swap. That makes the upgrade a strategic decision, not just a glass order.
Quick triage list: If you find soft wood, corroded spacer, or an impact-rating stamp, stop and document. Photograph labels, measure visible glass, and call a licensed installer to assess whether the opening needs structural reinforcement or a permited replacement.
Concrete example: A homeowner near downtown Ocala had recurring fogging and finally chose between two paths: replace three failed IGUs or upgrade the whole living-room assembly to laminated impact glazing. The IGU-only route was cheaper up front, but the installer flagged out-of-square jambs and recommended full-frame replacement to accept the heavier units. The owner took the full upgrade; it cost more initially but avoided repeated seal failures and qualified for an insurer discount on wind coverage.
Judgment that matters: In practice, impact upgrades pay off mainly when you plan to keep the house long enough to recoup energy and insurance benefits, or when the frame is already marginal. For most other repairs in Marion County, focus first on stopping moisture intrusion and fixing frame rot — those steps extend the life of any new glass you install.
Next action: Photograph any stamps, note visible frame condition, and confirm permit and insurance implications before ordering glass. If you want a licensed inspection that documents code and insurance compliance, request an on-site estimate at R C Windows & Doors.
Next consideration: verify permit and insurance rules before you buy glass — otherwise a cheap fix can become a costly compliance problem.
8. When to Hire a Professional and What to Expect from R C Windows & Doors
Call a pro when safety, code, or structural risk is on the table. Cracked tempered glass, shattered panes, failed insulated glass units with frame rot, high or oversized windows, and any work that could affect Florida Building Code or insurance coverage require licensed hands and documented processes.
Clear decision points
- Immediate professional call: for a broken door or large window that exposes the interior, or any shattered tempered glass — these are emergency window repair scenarios that need boarding or safe removal first.
- Schedule a technician: when you find fogged
IGUs, recurring seal failures, or visible sill rot — the right fix often combines glass replacement with frame repair and exterior resealing. - Consider an upgrade job: when you plan impact-rated glazing, low-E retrofits, or multiple adjacent window replacements. Bundling saves time and prevents mismatched units later.
Practical tradeoff: an emergency quick-fix protects the house but sometimes forces a nonstandard temporary glaze that complicates exact glass matching later. If the glass is replaceable quickly with the correct spec, do it; if not, insist on a documented temporary repair and a scheduled follow-up for permanent replacement.
What R C Windows & Doors does on an inspection — beyond a look-and-quote: measurement verification, glass type and stamp confirmation (tempered, laminated, impact), moisture-metered frame checks, on-site photos for insurance, and a written estimate that separates material, labor, disposal, permit fees, and warranty terms.
- Written timeline: order lead time, scheduled install window, and expected cure times for sealants.
- Permit handling: when replacements trigger a permit, R C Windows & Doors documents and files as the licensed contractor.
- Insurance support: itemized photos and paperwork suitable for claims, plus assistance with adjuster visits when applicable.
How to vet quotes: insist on glass specs (tempered, laminated, low-E, or IGU thickness), ask for local references, verify insurance and license, and avoid large up-front deposits for custom glass orders. A vague lump-sum number is a red flag.
Concrete example: After a night-time break-in at an Ocala home, the owner called for emergency window repair. R C Windows & Doors boarded the opening the same day, documented damage for the insurer, and scheduled a follow-up to replace the tempered door sidelite with the correct tempered unit and a reinforced frame. The temporary board protected the interior; the permanent work required a two-week lead time to order the tempered glass and coordinate a licensed installer.
Expectations checklist for the visit: clear photos and measurements, a line-itemed written estimate, stated warranty on workmanship and glass, timeline for ordering and install, and confirmation the installer will handle permits if required. If any of these are missing, ask questions before you sign.
If you need immediate help for a broken pane or security risk, call for emergency window repair first. For nonemergencies, prepare photos and measurements and request a covered onsite estimate from R C Windows & Doors contact.