

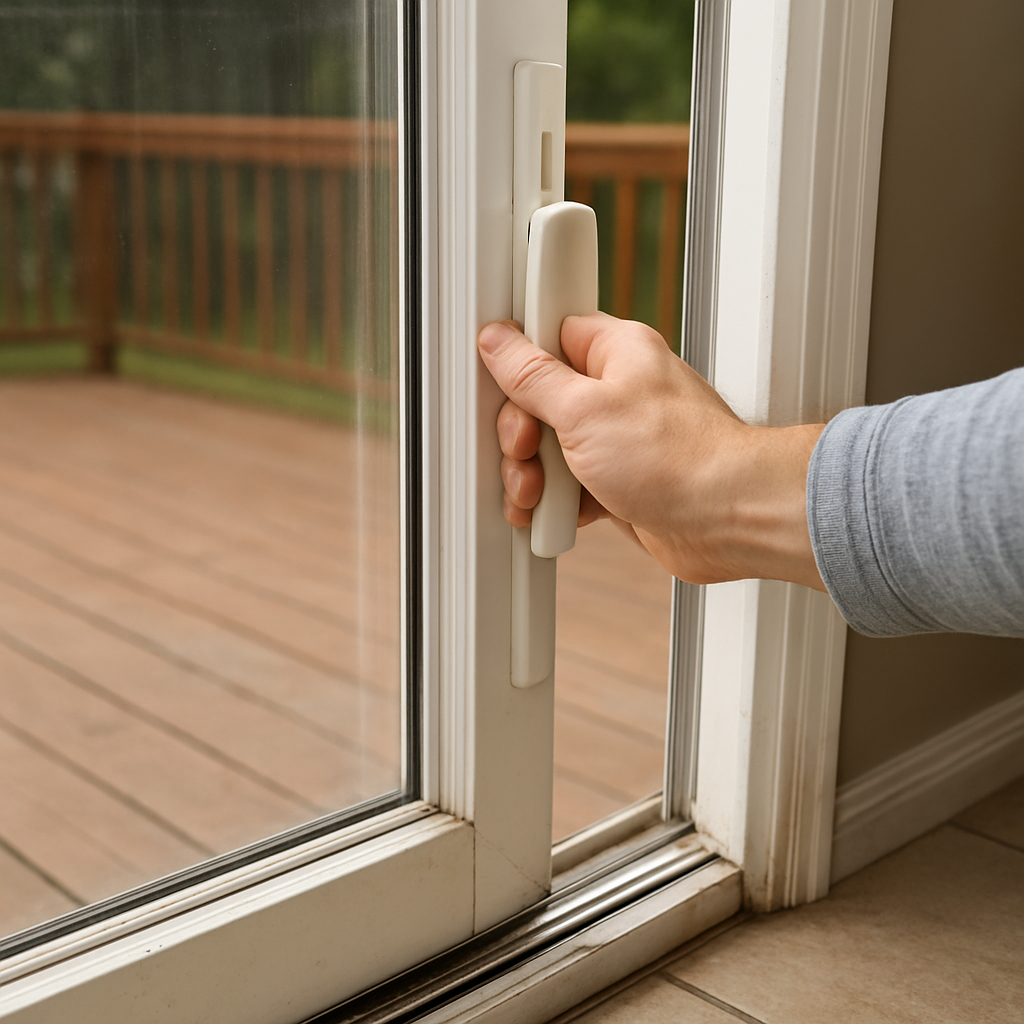
If your sliding patio door drags, sticks, or refuses to lock, sliding patio door repair is often a straightforward job — provided you diagnose the cause before you start. This guide gives a short diagnostic flow, safe DIY quick fixes with tools and time estimates, clear criteria for when to call a pro, and realistic Ocala cost ranges so you can decide whether to repair or replace. Read on to learn what to try now, what to avoid, and what a local technician will actually do.
1. Quick diagnostic flow to identify why your sliding patio door is stuck
Start at the sill. The fastest way to narrow the cause is a short, visible-first workflow: inspect the track, test the door movement, check the hardware, and look for glass or frame damage that requires professional attention.
Five-step diagnostic flow (5–10 minutes)
- Scan the track visually. Look for packed grit, pine needles, or raised metal ridges along the sill; small dents point to track damage, not rollers.
- Operate and feel. Open and close the door slowly. Does it stick at the same point? A single catch usually means a local track defect or foreign object; roughness the whole way suggests worn rollers.
- Lift test. With the door closed, lift the active panel straight up a few inches. If it lifts easily and drops in place, rollers are adjustable; if it does not lift, the roller housing is likely seized or corroded and requires a two-person lift or pro service.
- Check hardware and lock. Turn the lock and move the handle while the door is open. A stiff or sloppy lock points to latch misalignment or worn keepers, not the track.
- Inspect glass and frame. Look for cracks, fogging between panes, or noticeable sash tilt. Any sign of a fogged insulated glass unit or a bowed frame triggers a professional inspection.
Practical limitation: A quick visual flow will separate easy fixes from structural problems, but it cannot reliably detect sealed-unit failures or internal roller corrosion. If the door is heavy to lift or you see fogging inside the glass, stop further DIY checks and get a pro diagnosis to avoid damaging the sash or glass.
Real-world example: An Ocala renter reported the door stuck at the middle. Visual check found a 2-inch accumulation of wet mulch in the track and a small bent ridge. After removing the debris and tapping the ridge down, the door slid smoothly — the rollers were fine. The whole inspection and minor correction took 25 minutes.
Judgment call you need to make: If the lift test fails or the door is misaligned in the frame, this is not a low-risk DIY repair. Trying to force or pry a heavy panel is the single most common way homeowners escalate a small job into a costly glass replacement.
Key cue to call a pro: inability to lift the panel, cracked or fogged glass, or multiple failed rollers across both panels.
Quick next step: Do the 5–10 minute flow above. If results point to debris or a local ridge, you can proceed with basic cleaning. If you see fogged IGU, seized rollers, or a bowed frame, schedule a professional inspection via R C Windows & Doors.
2. Safe DIY quick fixes you can try right now
Immediate reality check: most stuck patio doors respond to cleaning, careful lubrication, and a simple roller adjustment — if the problem is mechanical and limited to one panel. These are the repairs worth doing yourself; anything involving heavy glass, fractured seals, or corroded housings is where a technician should take over.
Tools and materials you should have ready
- Basic kit: shop vacuum, stiff nylon brush, cotton rags, small plastic scraper
- Cleaning supplies: 70% isopropyl alcohol for residue — avoid bleach on metal parts
- Lubricant:
siliconespray (not petroleum); a tube of white lithium grease only for metal-to-metal keeper parts - Adjustment tools: flat screwdriver or 5/32 hex (check your door), Torx set for some older units
- Safety: work gloves, safety glasses, and a second person for lifting
- Optional: a short floor jack with a wood block for supporting the panel during roller adjustment
Clean first, then test. Remove loose debris with the vacuum and brush so you can see the track profile. Use the plastic scraper to lift hardened gunk and wipe the sill with alcohol. Do a quick slide test after cleaning — if smoothness improves, stop; do not lubricate until the sill is dry and free of grit.
Lubrication that helps instead of hurts. Use silicone spray sparingly on the track and roller surfaces; it repels dirt and stays stable in Ocala humidity. Avoid oil-based sprays — they attract grime and accelerate wear. If the latch rubs metal on metal, a tiny dab of white lithium grease on the striker helps, but keep grease off weatherstripping and glass.
Adjusting rollers without breaking anything. Locate the adjustment screw at the bottom edge of the active sash (often behind a small access plate). Raise the panel a hair while you turn the screw to raise or lower the roller – use a helper or the floor jack under a wood block to support the weight. Make small adjustments and test travel after each tweak; over-tightening can lift the panel out of the interlock and make the lock misalign.
Parts and sourcing judgement. Universal replacement rollers are cheap and convenient but frequently have different profiles or bearings that shorten life. If your door is mid- to high-end, bring the old roller to the RC Windows & Doors service page or a local supplier to match the part. Expect to pay more for OEM-style rollers, but they usually fit better and last longer.
Concrete example: A homeowner in Ocala cleared a half-inch layer of wet pine straw and hardened mud from the sill, cleaned the track, then applied a light silicone spray. The door still caught slightly, so they opened the access plate, supported the panel with a helper, turned the roller screw a quarter-turn, and regained smooth travel. Total hands-on time: a single afternoon; no parts required.
Safety limit: If the sash will not lift at all, the roller housing is likely seized or corroded — do not force the panel. At that point, stop and schedule a professional visit to avoid dropping the sash or cracking the glass.
Next consideration: if cleaning, lubrication, and small roller adjustments don’t restore smooth operation within a single session, the practical trade-off is time versus cost: further DIY fiddling risks damaging hardware; call a pro to diagnose whether you need roller replacement, track repair, or an insulated glass check.
3. When to stop and call a professional from R C Windows & Doors
Call a pro when the job shifts from cleaning and small tweaks to anything that risks the sash or sealed glass. Small debris, light lubrication, and minor roller adjustments are household tasks; structural distortion, sealed-unit failure, heavy seized hardware, and safety-related lock problems are not.
- Immediate pro visit recommended: visible cracks in the glass or shattered tempering, condensation trapped between panes, or a sash that will not move even when supported.
- Bring in a technician: both panels show wear or wobble, the track has sharp dents or a pronounced bend, or multiple rollers are grinding rather than rolling.
- Safety or security priority: the door will not lock, hardware is broken off, or a misaligned panel creates a large gap that lets water or intruders through.
Practical trade-off: a cautious DIY attempt can save a hundred dollars if you clean and adjust once. But forcing a heavy panel or improvising support often turns a simple roller job into a glass replacement that costs many times more. If you value avoiding that risk, budget for a professional diagnostic instead of guessing.
What a technician actually does on arrival: a trained service tech will measure sash plumb and track alignment, remove the active panel safely to inspect roller housings and bearings directly, test the lock and keeper under load, and inspect the IGU for seal failure. They diagnose whether parts can be matched and repaired on-site or if custom glass or a replacement track is required.
Concrete example: An Ocala homeowner tried to shim a sagging slider and ended up with a door that caught on the interlock. R C Windows & Doors removed the sash, found two collapsed rollers and a distorted sill rail, replaced the rollers with matched parts, corrected the sill profile, and rechecked the lock alignment. The fix required a professional lift and parts ordering; it was completed the next business day to avoid further damage.
Judgment you need to make: if a quoted repair approaches 50 to 60 percent of the cost of a new unit, replacement is often the smarter long-term choice because older frames and mismatched parts will keep causing callbacks. A reputable tech will show you the math rather than upsell unnecessary work.
If the door is heavy, has damaged glass, won’t lock, or shows multiple hardware failures, treat it as a pro job — safety and correct diagnosis save money over time.
How R C Windows & Doors helps in Ocala: same-day or next-day inspections when available, on-site matching of common rollers and hardware, written estimates with parts/labor breakdowns, and a parts-and-labor warranty. Book an inspection via the contact page or learn about common services on the sliding glass door repair page.
4. Realistic cost breakdowns with local examples
Straight to the point: dollars follow diagnosis and access. Two jobs that feel the same at a glance can end up very different on the invoice because of hidden corrosion, custom glass sizes, or how the frame was installed.
What changes the price in Ocala
Key drivers: parts match, labor intensity, and accessibility. Replacing a single roller is mostly parts + a short labor call. Replacing an insulated glass unit means ordering a specific-sized sealed unit and scheduling a technician for removal and reinstall — that raises the parts-to-labor ratio and the lead time.
Local factor: Central Florida debris and humidity speed up track wear and corrosion, which often converts a cheap service call into a more involved repair because technicians must remove rusted clips or straighten distorted sill rails before installing replacements.Concrete example: A homeowner called because their door scraped on startup. Technician matched an OEM-style roller, swapped it out, adjusted the sash, and charged an all-in fee under $350. Same neighborhood, different week: another house had a fogged pane — the IGU had to be ordered and installed over two visits, totaling about $750 and a short wait for the glass.
Trade-off to consider: cheap universal rollers save money up front but often fit poorly and shorten service life, creating repeat calls. Spending a bit more on a matched part or a technician who re-profiles the sill reduces callbacks and saves more over two to three years.
When repair becomes replacement: if the quoted repair climbs to around half the price of a comparable new sliding unit for your opening, replacement is often the smarter long-term option — newer units solve frame distortions, match current hardware, and come with fresh weatherproofing and warranties.
Estimate expectations: ask for a written breakdown showing parts, labor hours, travel, and warranty. R C Windows & Doors typically documents whether a job is a simple on-site repair or a multi-visit replacement and will provide a timeline. Book an inspection via R C Windows & Doors contact or see common services at R C Windows & Doors services.
Practical limitation: lead times for non-stock glass or specialty parts mean a repair that looks inexpensive can still take several days to complete. If you need immediate weatherproofing or security, ask the technician about temporary measures they can install the same day.
Next consideration: before you commit, get a written quote with parts identified by name or photo, a stated lead time, and a parts-and-labor warranty. That simple step prevents surprises and makes it easier to compare repair versus replacement options.
5. What to expect when R C Windows & Doors performs the repair
A technician visit is not just swapping parts — it is a short diagnostic project that manages risk, restores secure operation, and documents what was done. Expect the crew to treat the job like a mini restoration: protect the area, test the door under load, and verify that any correction solves the root cause rather than masking symptoms.
Typical on-site workflow
- Arrival and protection: lay down drop cloths, move patio furniture if needed, and confirm the access plan with you.
- Focused diagnosis: the tech will operate the door multiple times, inspect roller housings, check track geometry, and look for seal or glass failure evidence. Photos are taken for the record.
- Decision and options: you will be shown the failing components and given choices — a same-day temporary fix using stock parts, or an OEM-matched repair that may require ordering parts.
- Execution: parts are replaced or adjusted, the sash is reinstalled and dialed in for smooth travel and correct lock engagement.
- Verification and cleanup: the tech demonstrates operation, hands over before/after photos and a written invoice, and removes protective coverings.
Practical trade-off: technicians balance speed against longevity. A universal roller can restore function immediately but often needs replacement sooner; a matched part with proper re-profiling of the sill costs more up front and usually prevents a repeat call. Ask which route the tech recommends and why.
Limitation to watch for: if the frame or sill has lost its profile from corrosion or past repairs, replacing rollers alone may not fix alignment. In that case, expect the tech to recommend track repair or partial frame work — that raises cost and may require a return visit.
Concrete example: A homeowner in Ocala reported a door that kicked and caught near the middle. The technician removed the active sash, found a collapsed dual-wheel roller and a cracked plastic guide, matched an OEM-style roller, replaced the guide, and adjusted the sash height. The door was restored the same day; R C Windows & Doors provided before/after photos and a parts-and-labor note for warranty.
How to prepare and what to ask
- Clear a 6-foot work area: move rugs, furniture, and plants so technicians can set down tools and safely lift panels.
- Have your purchase info or photos handy: a photo of the door label or previous receipts speeds part matching.
- Ask for options in writing: request a short memo that lists the temporary fix versus the matched-part repair, estimated lead time, and the warranty offered.
- Confirm follow-up policy: inquire how warranty callbacks are scheduled and whether emergency security measures are available the same day.
Warranty and follow-up: Expect a written warranty covering the technician labor for a specified period and parts under their manufacturer terms. R C Windows & Doors documents repairs with photos and provides clear instructions for booking any warranty visit. To schedule an inspection, use the contact page or review services at R C Windows & Doors services.
Final takeaway: before work begins, confirm whether the immediate fix is permanent or provisional, get the timeline for any ordered parts, and secure a written parts-and-labor note. That prevents surprises and makes the repair auditable if something fails later.
6. Preventive maintenance checklist and schedule to keep sliding doors smooth
Start simple: a consistent, low-effort schedule prevents most failures that lead to a full sliding patio door repair. In Ocala the real enemy is grit and organic debris combined with humidity — handle that before you reach for replacement rollers or glass.
12-month maintenance timeline (practical, no-nonsense)
- Monthly quick check (5 minutes): Clear visible debris from the sill, sweep away pine needles and leaf litter, cycle the door two or three times, and check the lock engagement.
- Quarterly light service (15–30 minutes): Vacuum the track, brush with a stiff nylon brush, wipe with 70% isopropyl alcohol, and apply a light
siliconespray to the track and roller edges — avoid petroleum sprays. - After major storms or heavy pollen weeks: Inspect for new corrosion, displaced weatherstripping, or packed organic matter; remove and dry the sill immediately to prevent corrosion.
- Every 12 months (30–60 minutes): Remove the active sash if safe to do so, photograph roller housings and the track profile for records, tighten or replace loose keeper screws, and replace worn weatherstripping.
- Every 3–5 years (or at first sign of rough travel): Evaluate rollers and track geometry. Plan a professional inspection if rollers show flat spots, bearings are noisy, or the sill has permanent deformation.
Maintenance kit to keep on hand: a small zip tote with a matched spare roller or a clear photo of the existing roller, a bottle of silicone spray, nylon brush, a pack of replacement screws, and a roll of painter’s tape. Keeping a part or photo saves time when you call for parts or service.
Practical trade-off: doing the quarterly cleaning and a yearly inspection costs under $30 in consumables and about an hour of your time. That modest investment often delays or prevents a $150+ roller replacement and can halve the odds of ending up with fogged IGUs. But maintenance is not a cure-all: it will not fix bent or warped tracks or failed insulated glass — those need professional repair or replacement.
Real use case: a rental owner in north Ocala set calendar reminders to perform the quarterly routine and kept a photo log of the sill each visit. After two years they avoided one expected roller swap because minor build-up was caught early and the rollers retained smooth bearings; the small time investment eliminated an emergency call during heavy summer rains.
Judgment to apply: if your door is over 12 years old or the frame shows corrosion and multiple components are showing wear, preventive maintenance becomes diminishing returns. At that point plan budget and timeline for replacement rather than repeated part swaps.
Quick action list: Monthly wipe, quarterly clean+lube, annual sash/roller photo inspection, replace weatherstripping yearly in humid climates. If you spot seized rollers, fogged glass, or a bowed sill, book a professional sliding patio door repair inspection at R C Windows & Doors.
Doing regular, small checks is the highest-return maintenance move. It prevents most emergency calls, but it does not replace a professional inspection when rollers seize, glass seals fail, or the sill is permanently deformed.
7. Parts and terminology cheat sheet to help you talk to a technician
Start with the words that matter. Using the right name for a failed part speeds diagnosis and prevents vague quotes. Below are the common components you will hear on a call or see on an invoice, written in plain language with the symptom that usually points to that part.
Essential parts and what their failure looks like
- Rollers — the wheels the sash rides on. Symptom: rough travel, grinding, or a door that won’t lift. Ask whether they are ball-bearing rollers or nylon-bushing rollers; bearings roll smoother and last longer in wet climates.
- Roller housing / carriage — the metal or plastic bracket that holds the roller. Symptom: sash drops or won’t adjust even when roller looks OK; often corroded or cracked on older aluminum sashes.
- Track / sill — the bottom channel the roller runs in. Symptom: single-location catches, raised ridges, or visible dents; a bent sill may need re-profiling or replacement.
- Keeper / strike plate — the metal plate on the frame the lock grabs. Symptom: lock won’t engage or requires force; often just needs alignment or a new keeper screw.
- Interlock / astragal — the vertical overlap between two panels. Symptom: scraping at a specific point when panels meet, or poor weather seal between panels.
- Insulated glass unit (IGU) — the sealed double-pane assembly. Symptom: interior fogging or loss of insulating performance; replacement is a glass-specific job, not a roller fix.
- Tempered panel — the actual glass sash pane. Symptom: visible chips, cracks, or shattered tempering; safety issue and requires immediate pro handling.
- Handle and lockset — the user hardware. Symptom: handle spins, lock won’t latch, or security gap even when sash moves freely.
- Guide / anti-jump clips — small plastic or metal guides that keep the sash on track. Symptom: door rattles, lifts out of interlock in wind, or jumps the track.
Practical trade-off to know: replacing a roller is inexpensive compared with replacing a pro-filed sill. But if the sill profile is scored or bent, new rollers will wear prematurely. When a tech recommends re-profiling or sill repair, that ups front cost but reduces callbacks in Ocala’s gritty, humid environment.
Concrete example: A renter reported a slider that scraped only near the handle. The technician identified a split plastic guide and a flattened single-wheel roller. Replacing the guide and installing a matched dual-wheel roller eliminated the scrape and stopped the roller from developing a flat spot again. The fix required one return visit to source the matched roller but avoided a full sill rework.
What to bring or photograph before the technician arrives
- Photos of the bottom rail and track — shot from the inside with the door closed and open so the tech can see wear patterns.
- Close-up of the roller (if visible) — remove the access plate and snap a photo; a matching roller is often the fastest repair.
- Picture of the door label or purchase paperwork — if you have it, that speeds part matching for older or branded units.
Questions to ask that get useful answers: instead of asking how much, ask what part they will install, whether it is OEM or aftermarket, the expected life in years, and whether the quote includes adjusting the sash and verifying the lock. Request before/after photos and a parts list on the invoice.
How to verify the technician’s competence: look for a firm vehicle with tools and labeled parts, ask for proof of local business insurance, and request references or recent Google/Angi reviews from Ocala customers. A good tech will not guess at a sealed IGU condition — they will remove the sash for inspection and show you the failed part before ordering replacements.
If you can bring one thing to the estimate, bring a clear photo of the roller and the sill. It cuts the visit time and reduces misquoted parts.
Key takeaway: learning a handful of part names and documenting what you see turns sliding patio door repair conversations from vague to actionable. For scheduling and on-site matching of common rollers or IGUs in Ocala, use the R C Windows & Doors contact page at R C Windows & Doors contact.