

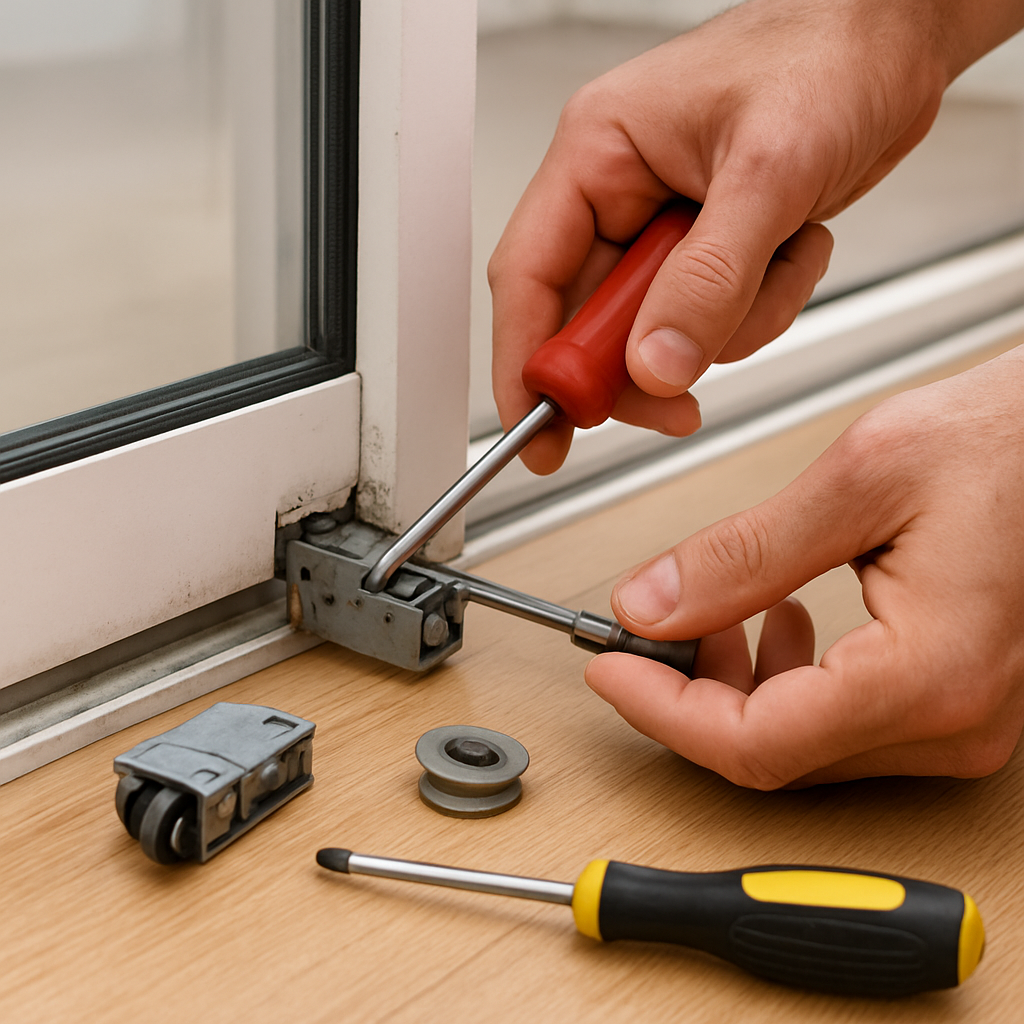
If your patio or sliding glass door drags, squeals, or will not lock properly, a targeted sliding door roller replacement is often the correct fix. Read on for quick diagnostics that separate worn rollers from bent tracks, step-by-step DIY replacement tips with the exact tools and parts you will need, realistic Ocala cost ranges, and clear criteria for when to hire a technician.
1. How to Diagnose Roller Problems Versus Track or Frame Issues
Start with the symptom, not the part. A door that drags or binds when you push it often points to rollers, but that is not a diagnosis; it is a clue. The practical test is simple: change the load on the sash and see what changes. If the behavior changes when you lift or shift the panel, rollers are the likely culprit. If it does not, look at track alignment, debris, or frame distortion.
Quick field checks that separate rollers from track/frame faults
- Lift test: unlock, then lift the sliding panel up off the bottom track by 1 to 2 inches while a helper steadies it. If sliding gets dramatically easier, the rollers or roller bearings are worn.
- Track inspection: shine a flashlight into the track channel and run a gloved finger along it. Embedded grit, bent lips, or a dent that catches your fingernail point to a track issue rather than roller failure.
- Plumb and reveal: place a 1-foot level against the face of the closed door and measure the gap along the top and bottom. Unequal gaps or a visible tilt indicate sash height or track alignment problems.
- Sound and feel: intermittent grinding with metal-on-metal vibration suggests broken bearings or a metal roller. A consistent sticky drag that smooths after cleaning suggests contamination in the track.
Practical trade-off and safety note: lifting the sash is the best quick test but it requires a second person and caution. Do not attempt alone if the glass is tempered or the panel is heavy. Replacing rollers is low cost, but repeatedly swapping rollers without addressing a bent or corroded track wastes time and money.
Wear patterns and what they tell you
Inspect the track grooves and roller faces. Long, parallel shiny lines on the track usually mean misaligned rollers or a tilted sash wearing on one edge. Localized gouges, dents, or stretched metal indicate an impact or bent track that will continue to destroy new rollers unless straightened or replaced.
Concrete Example: A rental unit in northwest Ocala had a door that scraped only at the latch end. The landlord lifted the panel, and the scraping stopped, showing worn rollers. After removing the sash, the track revealed no dents—just compacted sand. A roller replacement plus a thorough track clean restored smooth travel the same day.
If lifting the panel reduces the problem, buy rollers. If lifting makes no difference, budget for track or frame repair.
2. Tools, Parts, and Roller Types You Will Need
Get the right tools first. A correct toolset saves time and prevents damage: a matched set of screwdrivers (flat and Phillips), a 9/16 and adjustable wrench, a 3 mm and 5 mm Allen key, needlenose pliers, a pry bar or putty knife for trim, a utility knife, a small torque screwdriver, safety glasses and work gloves, plus a soft blanket or foam pads to lay the removed sash on. Bring a magnetic tray or small container for screws and the old rollers so nothing gets lost between trips to the hardware store.
Parts strategy and sourcing. Don’t guess at a part based on appearance from across the room — bring the old roller or take close, well-lit photos with a ruler beside it. You can source individual rollers or complete wheel kits from big box stores like Home Depot and Lowe’s, or order OEM and higher-end options through a local supplier. Roller kits often include shims, clips, and replacement screws; the small upcharge is worth it when you are doing the job yourself because it reduces return trips.
Roller types and practical trade-offs
Know the real-world trade-offs. The main choices are nylon tumblers, ball-bearing adjustable assemblies, fixed metal rollers, and full sash roller cartridges with integrated height adjustment. Nylon is quiet and inexpensive but wears faster on rough tracks. Ball-bearing rollers cost more and take slightly longer to install, but they glide under heavier loads and last longer. Metal rollers survive abrasion but will transmit noise and can accelerate track damage. Adjustable assemblies simplify getting the sash plumb, which often saves time on the second trip if the first install leaves the door uneven.
| Roller Type | Typical Price Range | Best Use Case | Main Trade-off |
|---|---|---|---|
| Nylon tumbler | 10-25 | Quiet, budget replacement on smooth, undamaged tracks | Less durable on gritty or bent tracks |
| Ball-bearing adjustable | 30-75 | Heavier glass, frequent use, long-term upgrade | Higher upfront cost; needs correct mounting profile |
| Fixed metal wheel | 12-40 | Industrial-style doors or when abrasion resistance matters | Noisy; can wear the track |
| Full sash cartridge | 50-120 | Older doors with integrated adjustment slots or hard-to-source hardware | More removal and fiddling required during install |
Concrete Example: In a gated Ocala condo, the bottom rollers were cheap nylon tumblers that flattened after years of sand in the track. The owner upgraded to Johnson Hardware ball-bearing adjustable assemblies. The install took two people 90 minutes, and the door required one final height tweak to align the latch — outcome: smoother travel and quieter operation, but a higher parts bill than swapping matching nylon rollers.
Measure three things before you order: roller diameter, mounting plate width, and the distance between the mounting screw holes. Photograph both faces of the old part.
Important: upgrading rollers solves performance only if the track and frame are serviceable — new bearings on a bent track shorten both the roller and track life.
Takeaway: match the roller profile and mounting dimensions first, then choose material based on noise, load, and track condition. If parts are hard to match or the track looks compromised, pause the DIY and get a professional assessment to avoid wasting parts and labor.
3. Step-by-Step DIY Sliding Door Roller Replacement
Straight to the point: replacing rollers is practical only when the track and frame are basically sound. If the bottom track is visibly bent or the sash will not lift out squarely, a DIY swap will at best be a temporary fix and at worst make the problem worse.
Prepare and protect
Mark and photograph: before you touch anything, stick painter’s tape on the sash edges marking which side faces out and take close photos of the roller, mounting plate, and screw pattern. These images are the single most useful thing you can show a parts counter or a technician.
- Support and safety: have a second person, wear gloves and safety glasses, and lay a padded blanket on sawhorses or the floor before removing the panel.
- Remove the sash correctly: unlock, lift the sash up to its highest travel to disengage top track, tilt the top out, and lower the bottom so the panel clears the track. If the bottom edge sticks, back out the height-adjustment screw fully before lifting.
- Extract the rollers: place the sash on its foam pad; remove the lower access plate or retainer screws, spray penetrating oil on any seized fasteners and let it soak if needed, then remove the rollers. Keep the hardware in a labeled container.
- Compare and prep new parts: line up the new rollers on the old mounting location. If the new assembly changes the mounting footprint or thickness, stop and consult a parts match or a pro.
- Install new rollers and set initial height: install the new assemblies finger-tight, then set the adjustment so the wheel is about flush with the bottom of the sash – this makes re-entry into the track easier.
- Reinstall the sash: lift the panel back at the same angle you removed it, seat the top into the head track first, and lower the bottom onto the rollers. Tighten fasteners and perform height adjustments to achieve even top and bottom gaps.
- Fine-tune and test: slide the door through full travel, lift to check for binding, adjust until the latch engages smoothly and there is no rubbing. Finish with a light silicone spray on the wheels and wipe any overspray from the track.
Practical limitation: if screws are riveted, or the roller cartridge is welded or corroded into the extrusion, forcing it risks cracking the sash or stripping the frame. That is the point to stop and call a technician.
Trade-off judgment: replacing only one roller on a panel often leaves an imbalance; replace both rollers on the same end or the entire set for reliable alignment. Upgrading to heavier ball-bearing rollers improves glide but can increase wear on a marginal track.
Concrete Example: a homeowner in Ocala removed a stuck panel and found the roller mounting screws rusted solid. They applied penetrating oil overnight, used a 1-inch driver to break the screws free the next morning, swapped both rollers on that panel, and spent about three hours total. The door now slides smoothly, and the latch engages without extra force.
Key step to avoid returns: measure and photograph the mounting screw spacing, plate width, and wheel diameter before buying parts.
If the sash will not lift square or the track shows deep gouges, replacing rollers is a short-term fix. Stop and get a professional diagnosis to avoid repeated labor and parts costs.
4. Typical Costs and How to Build a Realistic Estimate
Make an estimate, not a guess. Break the job into four billable pieces: parts, on-site labor, travel/service call, and contingency for hidden work (track straightening, seized fasteners, or glass). Treat the diagnostic visit as productive time, not free; technicians confirm whether you need a roller swap or a deeper repair, and that confirmation changes the price materially.
Practical insight: parts are cheap, but access and diagnostics are where costs concentrate.** A homeowner who buys the wrong roller and makes multiple trips will spend more in time and frustration than paying a modest service call for accurate part matching and same-visit replacement.
- Cost drivers to watch: labor per hour, whether parts are OEM, and whether the track requires straightening or replacement.
- DIY trade-off: you save on labor but accept risk of mismatched parts, stripped screws, and no labor warranty.
- Timing factor: off-season or weekday scheduling is often cheaper than weekend or emergency calls.
Concrete Example: A homeowner in south Ocala ordered two upgraded ball-bearing rollers after measuring the old parts, spent about two hours removing and installing them, and paid roughly $110 for parts and incidental supplies. By contrast, a neighbor called a technician who found a bent bottom track; the on-site quote combined parts, two hours of labor, and track replacement and landed near $520 because new aluminum track and finish work were required.
Judgment that matters: if the written quote lists only a flat roller price and a vague labor line, that is a red flag. Accurate estimates break out parts, diagnostic time, and a line for potential track or glass work. A realistic estimate will include a contingency and clear terms about warranties for labor and parts.
Estimate checklist before you call: measure wheel diameter and mounting hole spacing, take clear photos of the track and roller faces, note whether glass is tempered, count panels and note access constraints, and decide if you want an upgrade to heavy-duty or quiet nylon.
If a quote has unspecified labor hours or no contingency, budget 20% more and get the scope clarified in writing.
5. When to Hire a Technician from R C Windows & Doors
Hire a technician when the fix is diagnostic-heavy, access-limited, or carries safety and warranty risk. Swapping a matching roller on a clean track is one thing; diagnosing a sash that has shifted, a sealed double-glazed unit that needs replacement, or a bottom track crushed under a sliding screen requires tools, parts sourcing, and experience you do not want to improvise.
What a professional visit actually solves
A technician does more than change wheels. Expect a measured inspection, alignment checks for latch engagement, load testing throughout the door travel, and evaluation of surrounding frame and weatherseal. Technicians can straighten or replace the extruded aluminum track without stressing the sash, match obscure roller profiles, and handle tempered glass safely — services that remove the guesswork and reduce repeat trips.
Trade-off to consider: paying for professional diagnosis usually costs more up front but prevents repeated DIY part purchases and labor. If the door has had multiple roller swaps in short order, the underlying problem is rarely the rollers alone; a technician will spend the diagnostic time most homeowners skip and will often recommend the correct durable fix.
Concrete Example: A property manager called after tenants reported the patio door loosening monthly. The homeowner had been buying replacement nylon rollers each time. A technician from R C Windows & Doors found a slightly bent sill caused by settling and recommended a track realignment and stainless rollers. The repeat failures stopped and the door sealed properly; the manager avoided three more trips and parts purchases in the year that followed.
When to stop and call the pros (practical cues)
- Structural signs: sash will not lift squarely, or top/bottom gaps change under load — this points to frame distortion rather than simple wheel wear.
- Glass or safety concerns: cracked, chipped, or tempered glass, or any uncertainty about glass type — these require trained handling and disposal.
- Parts sourcing difficulty: if you cannot reliably identify or source the exact roller profile, a technician will match and warranty the part.
- Recurrent failures or water intrusion: recurring problems usually mean a compromised track or sill that needs professional repair to stop collateral damage.
Questions to ask when you book: ask for a written estimate, the brand or grade of replacement rollers offered, whether the work carries a labor warranty, and turnaround if OEM parts are required. If you need a same-day fix, confirm stock availability before the visit to avoid wasted trips.
Practical takeaway: If safety, repeat failures, mismatched parts, or visible frame damage are present, choose a technician.
Final judgment: do the DIY swap if the track is clearly sound, the roller profile is an exact match, and you accept no labor warranty. Call a technician for anything that looks off-pattern, involves heavy or tempered glass, affects security, or when you want the fix to last without repeat service calls.
6. Preventive Maintenance to Extend Roller Life
Direct point: routine maintenance is the cheapest way to avoid a full sliding door roller replacement and the downstream cost of track or frame repair. Small, regular actions interrupt the two common failure paths: abrasive grit wearing the wheel face and persistent moisture causing corrosion or swollen seals. These are cheap to stop now and expensive to fix later.
Practical cadence and tasks
- Monthly quick check: run the door through its full travel, listen for new noises, and feel for intermittent snags. Log anything that stands out so you can compare later.
- Quarterly clean: remove loose dirt with a handheld vacuum, then use a stiff nylon brush to dislodge compacted sand from the corners and channel edges. Wipe dry with a clean rag.
- Seasonal tune-up (spring/fall): remove the lower access plate, inspect roller bearings for play, tighten any loose fasteners, and correct obvious misalignment with small height adjustments.
- Annual drainage and seal inspection: confirm bottom track drains are clear and bottom seals are intact; replace cracked seals before water undermines the sill or corrodes fasteners.
Lubrication strategy and a common mistake: choose a low-residue lubricant that is explicitly compatible with the wheel material and the track finish. Over-lubricating or using heavy oil creates a film that traps grit; the result is accelerated abrasion, not smoother travel. If your door uses composite or polymer wheels, avoid petroleum-based greases that can degrade the wheel over time. Check the door manufacturer warranty before applying aftermarket products — some warranties are voided by certain chemicals.
Practical limitation: maintenance prevents predictable wear but will not correct a bent sill, misaligned frame, or badly scored track. If you find deep grooves or the sash does not sit square after adjustments, maintenance only postpones failure. At that point, bring in a technician to decide whether straightening or full track replacement is the economical choice.
Concrete Example: A homeowner in East Ocala made a habit of clearing the lower channel and blowing out weep holes each quarter. After a heavy summer storm, the door slid with no dragging and the lock engaged cleanly without a repair call. Contrast that with a neighbor who ignored debris buildup; within a year, the neighbor needed a new roller set plus a corroded track section replaced because water had pooled and rusted the hardware.
Judgment you should apply: invest time in small, repeatable maintenance steps if you want reliability. If you are deciding between a quick DIY tune-up and an on-site professional visit, choose the pro when you see any structural symptoms — visible bends, persistent water pooling, or unusual sash twist. Professional diagnostics avoid wasted parts and labor, and local technicians can also source OEM-compatible parts that last longer than generic swaps.
Action to take now: schedule a recurring maintenance slot in your calendar, take photos of the sill and rollers before and after cleaning, and if anything looks off, request a diagnostic visit from R C Windows & Doors sliding glass door repair to avoid repeated repairs.
7. Two Local Case Examples and Expected Outcomes
Same symptom, different fixes. Two real Ocala jobs below show how identical complaints can lead to very different scopes, timelines, and costs depending on whether the root cause is rollers, track, or both.
Silver Springs Shores condo – quick fix with an upgrade
A homeowner reported a patio door that dragged and squeaked only at one end. Inspection showed flattened nylon wheels and compacted grit in the channel, but the aluminum track was straight. The tech removed the sash, cleaned the channel thoroughly, and installed ball bearing adjustable rollers sized to the existing mounting plates. The result was immediate: smooth glide, quieter operation, and a measurable reduction in repeat service calls for that unit.
Practical tradeoff: upgrading from nylon to ball bearing costs more up front but reduces friction and extends life on otherwise serviceable tracks. Expect a short downtime window while parts are installed, and minimal follow-up if the track is sound.
Downtown Ocala rental property – track replacement to fix security
A tenant reported the sliding door pulling off track and the lock failing intermittently. On arrival, the technician found a bent bottom track and multiple worn rollers. Replacing rollers alone would have failed within weeks because the distortion forced uneven loading. The correct repair required a new bottom track section and stainless steel roller assemblies, which restored secure locking and stopped water pooling at the sill.
Consideration for landlords: when a door affects tenant security, prioritize a durable repair over a temporary roller swap. The faster, cheaper patch increases liability and almost always costs more over time in repeat service and tenant disruption.
A few less obvious but valuable observations from these two jobs: local parts availability controls turnaround. If a specific roller profile is uncommon, a technician who stocks parts or can source OEM replacements avoids multiple visits. Also, documentation matters. A pro documents the condition of the track and sash, which helps when a later warranty claim or insurance conversation is required.
Key takeaway: treat the downward lift test and track inspection as a decision point. If the track is straight and free of deep gouges, a roller replacement or upgrade is a durable fix. If you see bent metal, recurring lock problems, or tenant safety concerns, plan for track work and professional service.
Next consideration: before you buy parts or schedule a DIY day, take clear photos of the track edge and roller mounting plate. That small step separates a one-afternoon DIY from a longer professional repair that addresses the real problem.
8. Next Steps and How to Prepare for a Service Visit
Prep sharply and you cut cost and downtime. A technician needs two things to finish in one visit: accurate information up front and clear physical access on arrival. Missing measurements, unclear photos, or blocked work space are the usual reasons a simple sliding door roller replacement turns into two trips and extra charges.
What to gather and send before the visit
- Photos: close-up of the lower track, roller mounting plate, and any dents. Include a ruler or tape measure in the shot so scale is obvious.
- Measurements: panel width and height,
wheel diameterif visible, and distance between mounting screw holes if accessible. - Symptoms log: brief timeline (when did it start, progressive or sudden, weather or tenant activity tied to problem). Note if the glass is tempered or has visible chips.
- Access notes: which exterior door the tech will use, gate codes, parking constraints, and best 2–3 appointment windows.
Practical trade-off: the more complete your pre-send package, the higher the chance of same-day repair. If you cannot measure accurately, send several clear photos from different angles and let the technician confirm on arrival.
Set the scene at the house
- Clear a 6 ft work zone in front of the door and move fragile items away from the swing path.
- Secure pets and children out of the work area—technicians need uninterrupted access when lifting heavy sashes.
- Provide basic utilities: an accessible 110V outlet, a bright light source if the job runs late, and a garbage bag for old parts.
- Remove or label the screen if present so the tech can take it out quickly without guessing where pieces go.
Decide on parts sourcing before the tech arrives. Letting the technician supply parts usually costs a little more but saves time and comes with a parts/labor warranty. Buying parts yourself reduces parts costs but shifts the risk of wrong profile or return hassles to you.
Onsite flow and timing to expect. Plan for a 30–60 minute diagnostic. If the correct rollers are in the techs truck, the swap is often finished that day. If not, expect a follow-up window for parts delivery; authorize a contingency spend to avoid a hold-up — for example, give permission to proceed up to a pre-agreed amount so the tech can purchase a compatible part immediately rather than returning for approval.
Concrete Example: A property manager in Ocala emailed clear photos with wheel diameter and screw spacing at 8:00 AM. The technician arrived with the matching ball-bearing kit and completed replacement the same afternoon. A neighbor who ordered parts without measurements received the wrong profile and paid two service calls.
Judgment call that matters: if the door shows any sign of bent track, recurring failures, or security issues, do not authorize a straight roller swap on-site without a written estimate. That small habit prevents wasted parts and repeated labor.
Good prep — clear photos, accurate measurements, and an unobstructed workspace — is often the difference between a same-day sliding door roller replacement and multiple costly visits.
Action checklist: take three photos (close-up of roller, wide shot of track, image with tape measure), note panel dimensions, clear the work area, decide whether you want the tech to source parts, and book two available appointment windows. For local service and on-site part matching, schedule an inspection at R C Windows & Doors sliding glass door repair.